Top 15 Best Super-Fast Windows Tips for bloggers

Top 15 Best Super-Fast Windows Tips for bloggers

Here are the top 15 best window tips for my best bloggers.
Tip 1: To restrict the disk space for shadow copies
Shadow copies provide security by automatically and in the background make periodic backups of your data. So they are very practical and useful, but take up a lot of disk space. Storage is scarce; you can restrict the space for shadow copies and can automatically delete old backups. Go to the Control Panel to “System” and then “System Protection “in the left column. Select the first drive, and click “Configure.” You can change the maximum occupancy to make room for new data on the slider. You see there also the actual occupancy; however, the maximum occupancy should not be too small to continue to enable the System Restore system problems and also older versions of files to choose from.
Tip 2: Simply create a lot more free space
Just solid-state drives, which often do not have unlimited disk space, quickly reach its capacity limits. Of course you can manually uninstall programs or delete files to make space. But if it is to go fast and you need safe place, should the Windows 7 disk cleanup effort. Look first in Windows Explorer by right-clicking on the C: drive under properties according to how much free space is available. Close all applications, and enter in the Start search box “Search programs / files” the term Disk Cleanup and select the entry “disk space by deleting unnecessary data.” The hard disk is analyzed, then a window will open with various options from which you can choose to delete data. For each item you select, an explanation is displayed below under “Description”. You decide what information you need and what you can do without – the most space you create a rule by the removal of temporary files. Click “OK” to start the cleanup, and press the “Delete Files” in the next window by clicking on. The cleanup may take several minutes to complete depending on the computer. See you again as described above on the C: drive under the “Properties” to find out how much free space is available now.
Tip 3: Do not open a file type with the standard program
Normally, each file type is opened with an assigned standard program. Sometimes, however, you would like a file but rather open with another program. The easiest way: you drag the file holding the Shift key plus the left mouse button with the mouse on the icon of the program with which the file is to be opened. The file is opened with the alternative program, of course, only if the program with the file type at all can handle. In contrast, if the standard program be changed permanently, click the right mouse button on the file and go to the menu item at the bottom called “Choose default program …” From the selection that appears, select the program with which this file type to always open in the future. To do this, make sure that the bottom left point of the “always open with the selected file type program” is checked, and confirm the selection with “OK.”

Tip 4: To stop hanging processes without data loss
Freezes a program, you can stop it using the Windows Task Manager. In this sledgehammer then but the file is gone many times where you might just work. Gentle is another method. You should before the Task Manager to try better if you can only stop that faulty process, which is responsible for the problem. You can do this by typing in “start / search field” the term “Resource Monitor” and search for “overview” a red entry. This is the “hanging” process, where you click with the right mouse button. Select from the context menu, select “analyze queue” and exit the entry marked as faulty. With any luck, then your application is running again, the open file is still available and you can without interruption or loss of data on working.
Tip 5: Dashing off
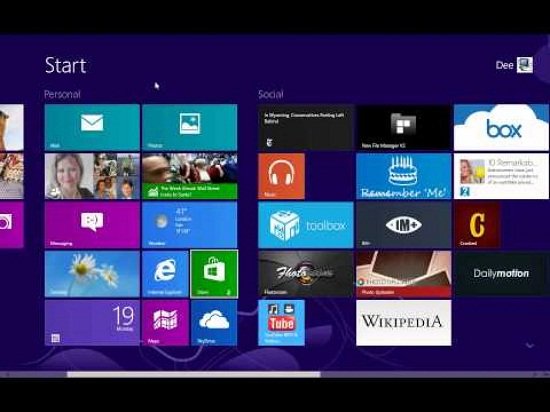
With Windows 8 a lot more complicated than before, as well as turning off the computer. The missing start button makes life not just easier. From the desktop interface, take your PC with “Alt + F4” but quickly shut.
Tip 6: Fix for the Charms menu
The more or less useful Charms menu on the right side of the screen opens when the cursor to the right side of the screen drives. Much easier way, however, the key combination “Windows key + C “. Hide it in the same Article
Tip 7: Quick search
One of the greatest strengths of Windows 8 is the effective search. These start quickly over the keyboard shortcuts “Windows key + F “(search in the settings) or” Windows key + F “(starts the search in your files).
Tip 8: make screenshots
If you want to quickly make a screenshot in Windows 8, which is done with the keys “Windows key + print.” The final PNG image is automatically stored with the images in a newly screenshots folder.

Tip 9: convenient control program window with hotkeys and move
Windows can be the name of the operating system according to several different program windows open at the same time and arrange them manually, by sliding it to the desired location on the desktop. Much faster than using the mouse is that, by activating the desired application window and controls the window using the Windows key. The combination of the Windows key and the keyboard arrow keys to move the window to the top, left or right of the screen or minimize the window with the combination of Windows key and down arrow.
Tip 10: Enable Clear Type
It hits almost every: With age, the vision takes off unfortunately. Windows 7 has therefore called Clear Type text optimization, which should make text more readable on flat screens. How can you enable Clear Type? Go to “Start / Control Panel”, and then type in the search box at the top right of the word “clear type” field. Click “Adjust Clear Type text” and check the box next to the menu item “Enable Clear Type “. Then you go through four Text opimierung windows, where you always select the most readable text. After a final click “Finish” on the appearance of the fonts will be optimized according to your specifications.
Tip 11: How do you hide files on your own computer
Especially if several people work on a common computer in exchange, you may want to hide files. This is possible in a simple manner. One thing, however at this point right away: With professional sniffer tools to detect nearly all the files are the hidden with the following trick. So if you absolutely effectively “hide” like, so that the CIA or the FBI has their work cut with the decryption, the same should prefer instead a tool such as the freeware True Crypt use. But it is only a matter of making files for other users virtually invisible, proceed as follows. For example, the folder: to hide “C: \ Users \ Stefan \ photos”, go to “Start / Programs / Accessories” on the “Command Prompt”, enter the command “attrib c: \ Users \ Stefan \ Photos + s + h “and press the” Enter “key. In Windows Explorer, this folder is now no longer visible after update. To open the folder in the future, enter the Windows Explorer, simply complete the path “c: \ Users \ Stefan \ Photos” one. It can be for those who know the exact address open problems, but remain invisible to unauthorized users.
Tip 12: With the option “save energy” Caution: Data loss threatens
If you do not want to completely turn off your computer, so that the restart takes less time, you have two options: you can either your computer in “sleep mode enable “or select the” Power Save “option. The special feature of the second method is that Windows does not store the data that is currently used on the relatively slow hard drive, but in the fast, but unfortunately volatile memory stores. This is indeed fast restart, the computer still needed but also in the off-state current in order not to lose the data saved in. If the computer is normally connected to a power outlet, the data remain so easily obtain. However, the PC hangs on a power strip and turn this bar from accidentally, the data of the current session lost. Turn off the computer then a, is a complete restart. For notebooks, the data is backed up, however from memory to disk when the battery level drops below a minimum threshold.

Tip 13: How to delete data directly and without any trash
Whenever you want to delete a file, it is initially placed in the trash. This can be circumvented. To the trash is indeed a good thing, because accidentally deleted files can be from the trash out quickly recover . Sometimes you want but actually delete files completely, without leaving a digital copy in the trash. This can be especially useful when multiple users share a computer, and not everyone will see what files you have deleted. Hold to delete without trash the Shift key (Shift key) while you delete the file. A query whether the file should be deleted irrevocably follows. Click on “Yes” and already the file is permanently deleted. If the inquiry annoying, they can be shut off via the “Recycle Bin Properties”. To do this, right-click the Recycle Bin, go to “properties” and remove the check mark for “delete confirmation dialog to show . ”
Tip 14: Using the Windows Safe you conveniently manage passwords
Passwords and login information as part of the computer keyboard and mouse. Unfortunately, the use of passwords is as tedious as dangerous. The largely unknown Windows Safe makes as a very practical component of many Microsoft applications much easier. With its help, leave passwords for many Microsoft applications centrally manage, save, and even export and import. So the vault is used for central management of credentials and passwords. All the information stored can be edited or exported to another computer. To start it, type over the search window at start “safe”, and press “Enter.” “Add Windows credentials” via the command can now access Windows Live for example, enter virtual PC or MS Exchange Server, and save with “OK”. If all data are entered, you can save this “secure vault” over the command on a USB stick to project beyond the data to another computer. There click then similar to “Safe Restore” button to import the saved credentials.
Tip 15: Encrypt USB stick
Very practical: Windows 7 comes with a tool that allows you to encrypt data stored on a USB stick. You lose the stick, the data are therefore not accessible to third parties.Here’s how: Copy the data on the drive, and click it in Windows Explorer, then right-mouse button. Select “Enable Bitlocker” command, and enter a password in the next step, which allows the drive to be unlocked later. Then you can still have a recovery keysave or print that you can restore the drive, if you have forgotten the password. By clicking on “Next” to start the encryption process, which can take several minutes.
- computer tips
- featured
- tips and tricks
- Top 15 Best Super-Fast Windows Tips for bloggers
- window tips
- Windows Tips for bloggers

Kitchen Renovation Social Media Post Design

Best Apps to Have on your Phone - Both iOS and Android

Real Estate Social Media Post Design

ICC Men's T20 World Cup Warm-up Matches 2026 – Oman Team PNG Photos (High Resolution Download)

ICC Men's T20 World Cup Warm-up Matches 2026 – Scotland Team PNG Photos (High Resolution Download)

Sri Lanka vs Pakistan – Rivalry, History & Match Preview


